How to Accept Crypto Payments in Rails
UPDATE:A few days after publishing this, Coinbase have decided to shut down Coinbase Commerce, without any notice. The info here no longer applies.
I wanted to see what it would take to implement crypto payments in PixelPeeper. With Coinbase Commerce, it’s surprisingly easy.
In this post
How does it work?
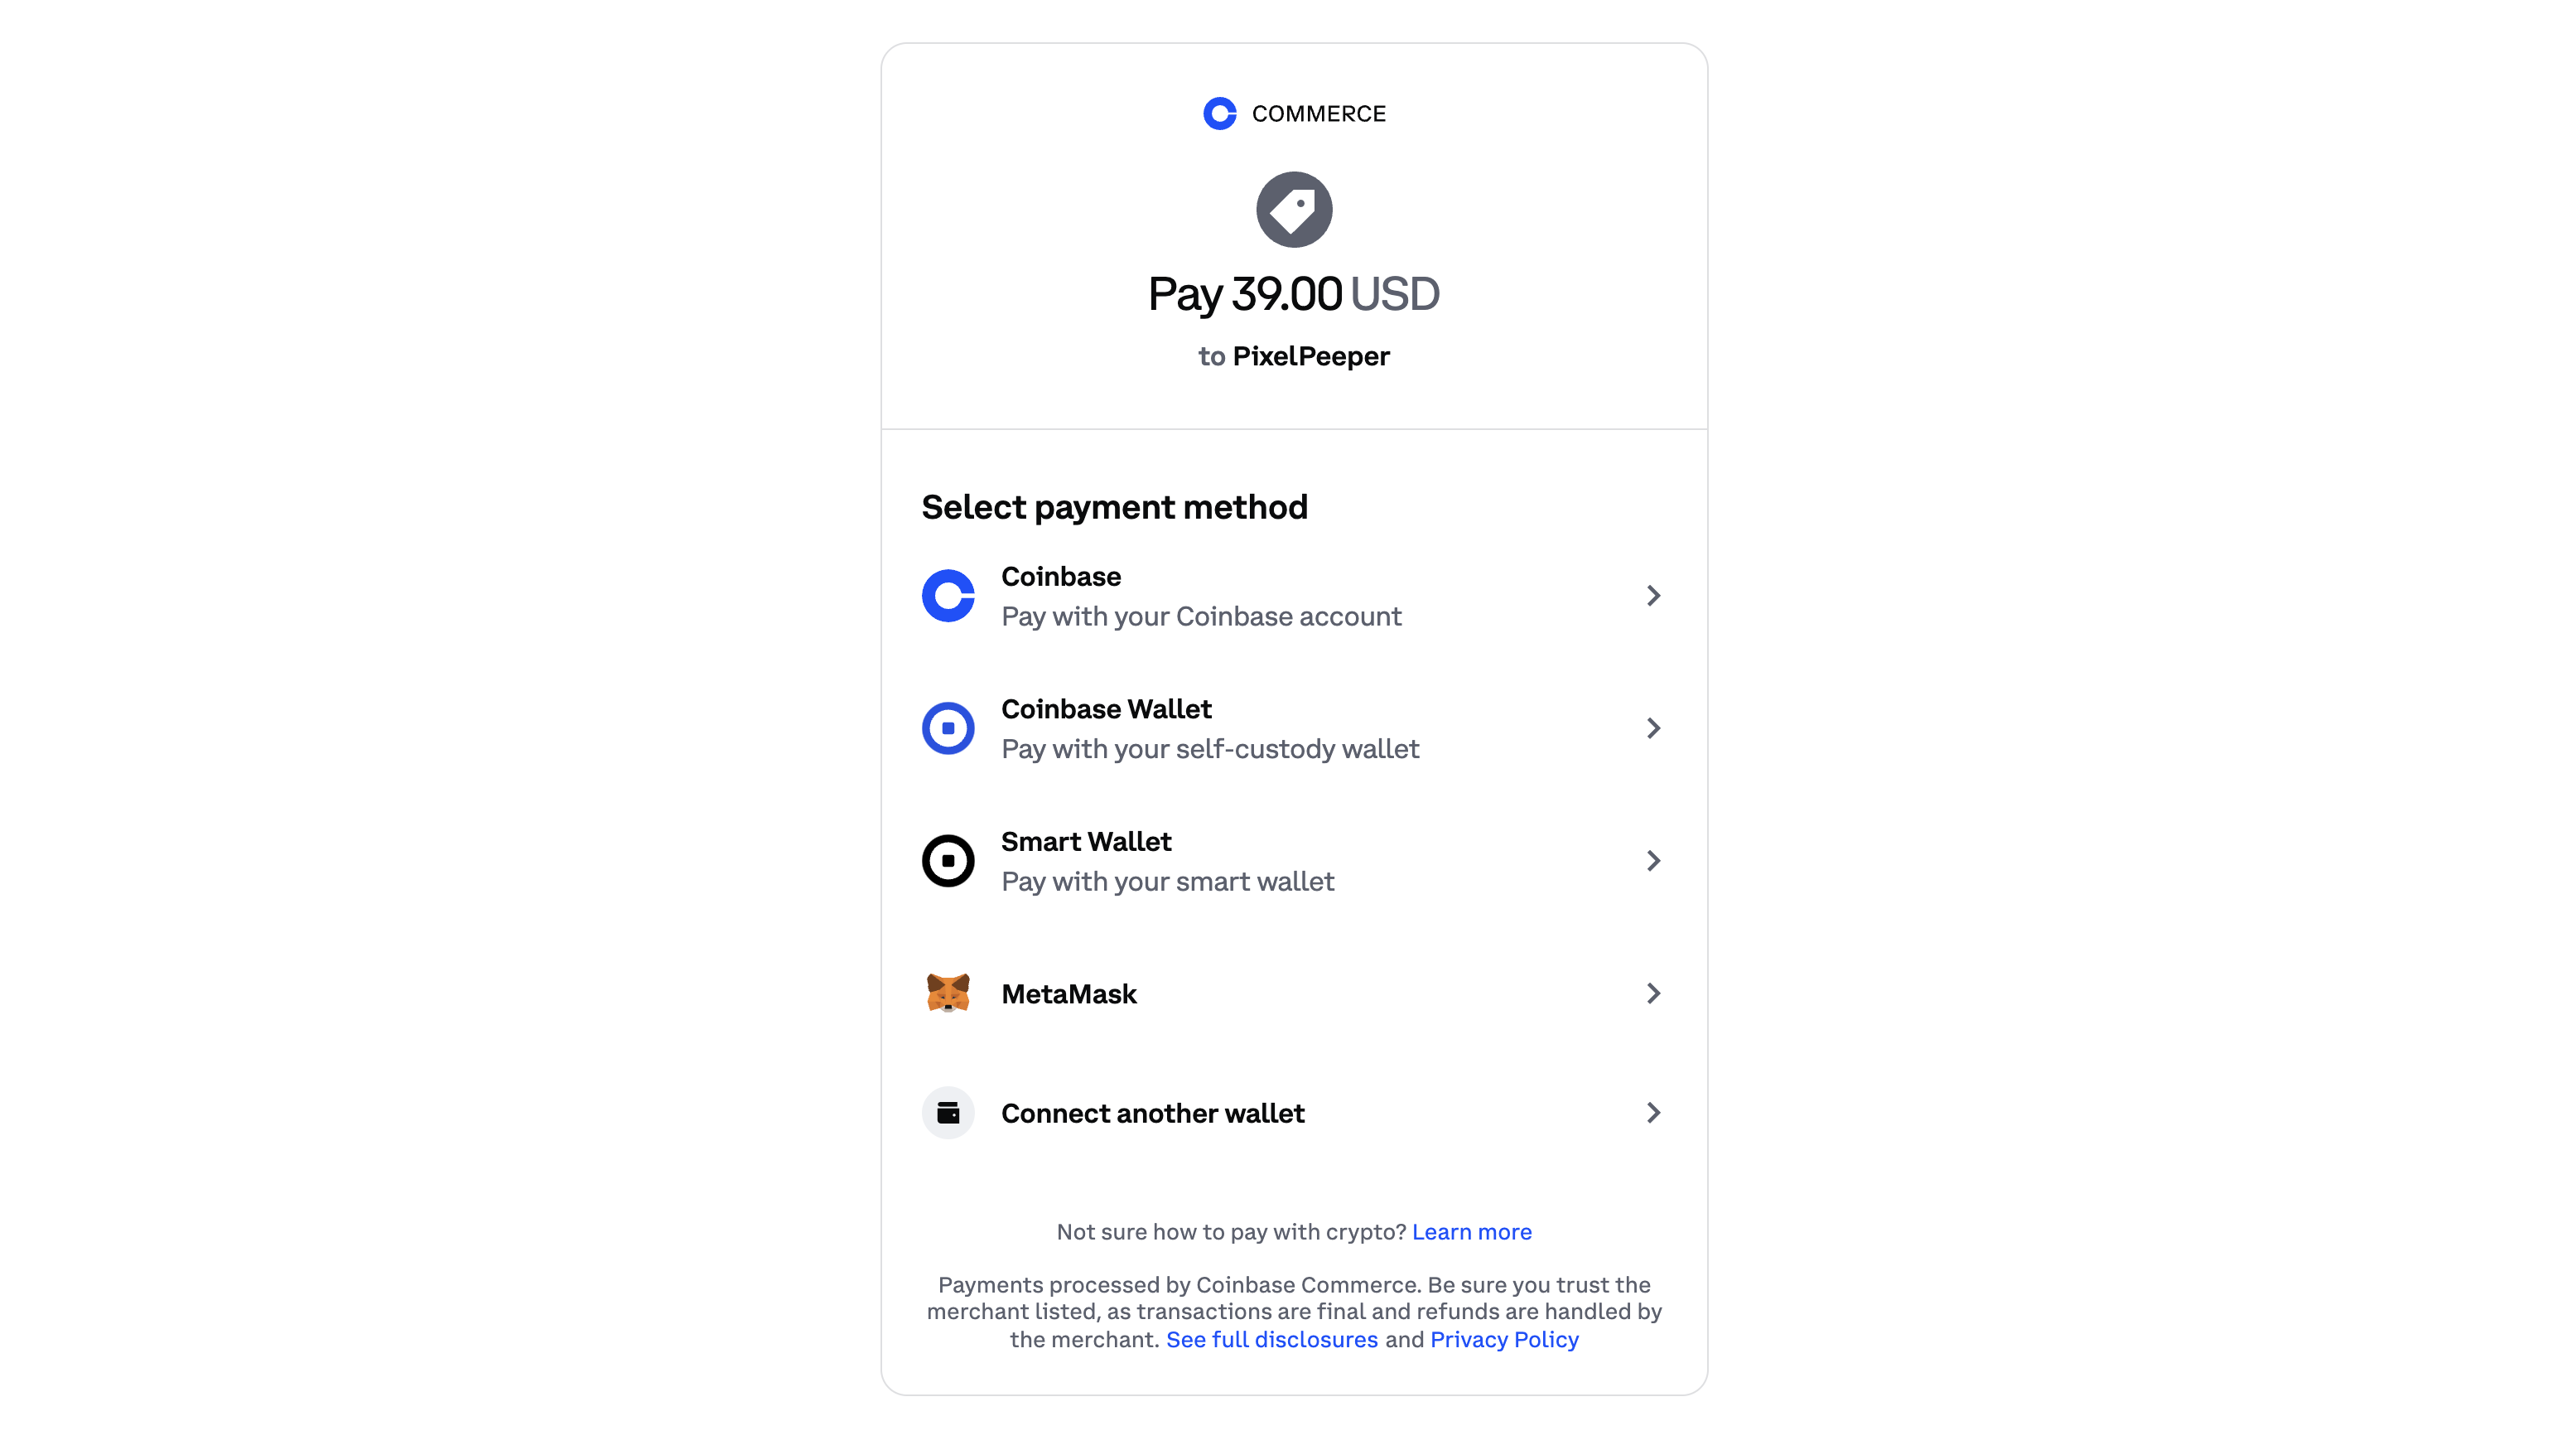
To accept crypto, you’ll need an ETH wallet address and a Coinbase Commerce account. Coinbase provides a nice hosted checkout page, where users have multiple options to pay (the funds will be converted to USDC). Upon successful payment, Coinbase will collect a small fee and the funds will be sent to your ETH address (there’s a caveat, see the last section).
If you set aside the usual UX woes of crypto, the Coinbase Commerce product is quite straightforward. It does seems to be a bit of an afterthought, though, and the official integration focuses on React. The API docs are lacking and not easy to track down in the first place.
That said, the product works well enough and the integration in Rails is easy once you figure out the necessary bits.
Setup
To get started, you’ll need a Coinbase Commerce account. Once you’re signed up, you’ll have to set up your deposit address (an ETH address).
Then go to the settings and create a new API key. Copy it and store safely, either in Rails credentials or in an environment variable.
In the dashboard, you’ll see options to create products and donations. You don’t have to bother with that.
We’ll be using plain HTTP requests, because it’s not that much code. However, if you need a complete API wrapper, check out Coinbase Commerce Client.
Create a Charge
To start a payment process, you’ll need to create a charge. We’ll POST a request to the /charges endpoint with the following details:
- Product name and price in USD
- Metadata to identify the user/order (this will be sent back to you in the webhook)
- Redirect URL: where the user will be redirected after the payment is complete
- Cancel URL: where the user will be redirected if the payment is cancelled
The Coinbase endpoint will return a hosted_url, which is a checkout page that you will redirect the user to:
Webhooks
Once the user has completed the payment, you’ll receive a webhook with the following details:
{
  "api_version": "2018-03-22",
  "created_at": "2025-10-20T22:40:22Z",
  "data": {
    "brand_color": "#122332",
    "brand_logo_url": "",
    "charge_kind": "WEB3",
    "code": "[REDACTED]",
    "collected_email": true,
    "confirmed_at": "2025-10-20T22:40:22Z",
    "created_at": "2025-10-20T22:24:07Z",
    "description": "PixelPeeper Lifetime Access",
    "expires_at": "2025-10-22T22:24:07Z",
    "hosted_url": "https://commerce.coinbase.com/pay/[REDACTED]",
    "id": "[REDACTED]",
    "metadata": {
      "email": "[REDACTED]",
      "id": "[REDACTED]"
    },
    "name": "PixelPeeper",
    "ocs_points_override": false,
    "organization_name": "PixelPeeper",
    "payments": [], // REDACTED
    "pricing": {
      "local": {
        "amount": "39.00",
        "currency": "USD"
      },
      "settlement": {
        "amount": "39",
        "currency": "USDC"
      }
    },
    "pricing_type": "fixed_price",
    "pwcb_only": false,
    "redirects": {
      "cancel_url": "https://pixelpeeper.com/payment/new",
      "success_url": "https://pixelpeeper.com/payment/thanks",
      "will_redirect_after_success": true
    },
    "support_email": "[email protected]",
    "timeline": [
      {
        "status": "NEW",
        "time": "2025-10-20T22:24:07Z"
      },
      {
        "status": "SIGNED",
        "time": "2025-10-20T22:24:29Z"
      },
      {
        "status": "PENDING",
        "time": "2025-10-20T22:26:22Z"
      },
      {
        "status": "COMPLETED",
        "time": "2025-10-20T22:40:22Z"
      }
    ],
    "web3_data": {
      "contract_addresses": { }, // REDACTED
      "contract_caller_request_id": "",
      "failure_events": [],
      "settlement_currency_addresses": { ... },
      "subsidized_payments_chain_to_tokens": null,
      "success_events": [], // REDACTED
      "transfer_intent": { // REDACTED
        "metadata": {
          "chain_id": 8453,
          "contract_address": "0x...",
          "sender": "0x..."
        }
      }
    },
    "web3_retail_payment_metadata": {
      "exchange_rate_with_spread": {
        "amount": null,
        "currency": null
      },
      "exchange_rate_without_spread": {
        "amount": null,
        "currency": null
      },
      "fees": [],
      "high_value_payment_currencies": [
        "usdc",
        "btc",
        "eth",
        "sol",
        "xrp"
      ],
      "max_retail_payment_value_usd": 10000,
      "quote_id": "",
      "source_amount": {
        "amount": null,
        "currency": null
      }
    },
    "web3_retail_payments_enabled": true
  },
  "id": "[REDACTED]",
  "resource": "event",
  "type": "charge:confirmed"
}
Coinbase will also send a webhook whenever a charge is created or updated.
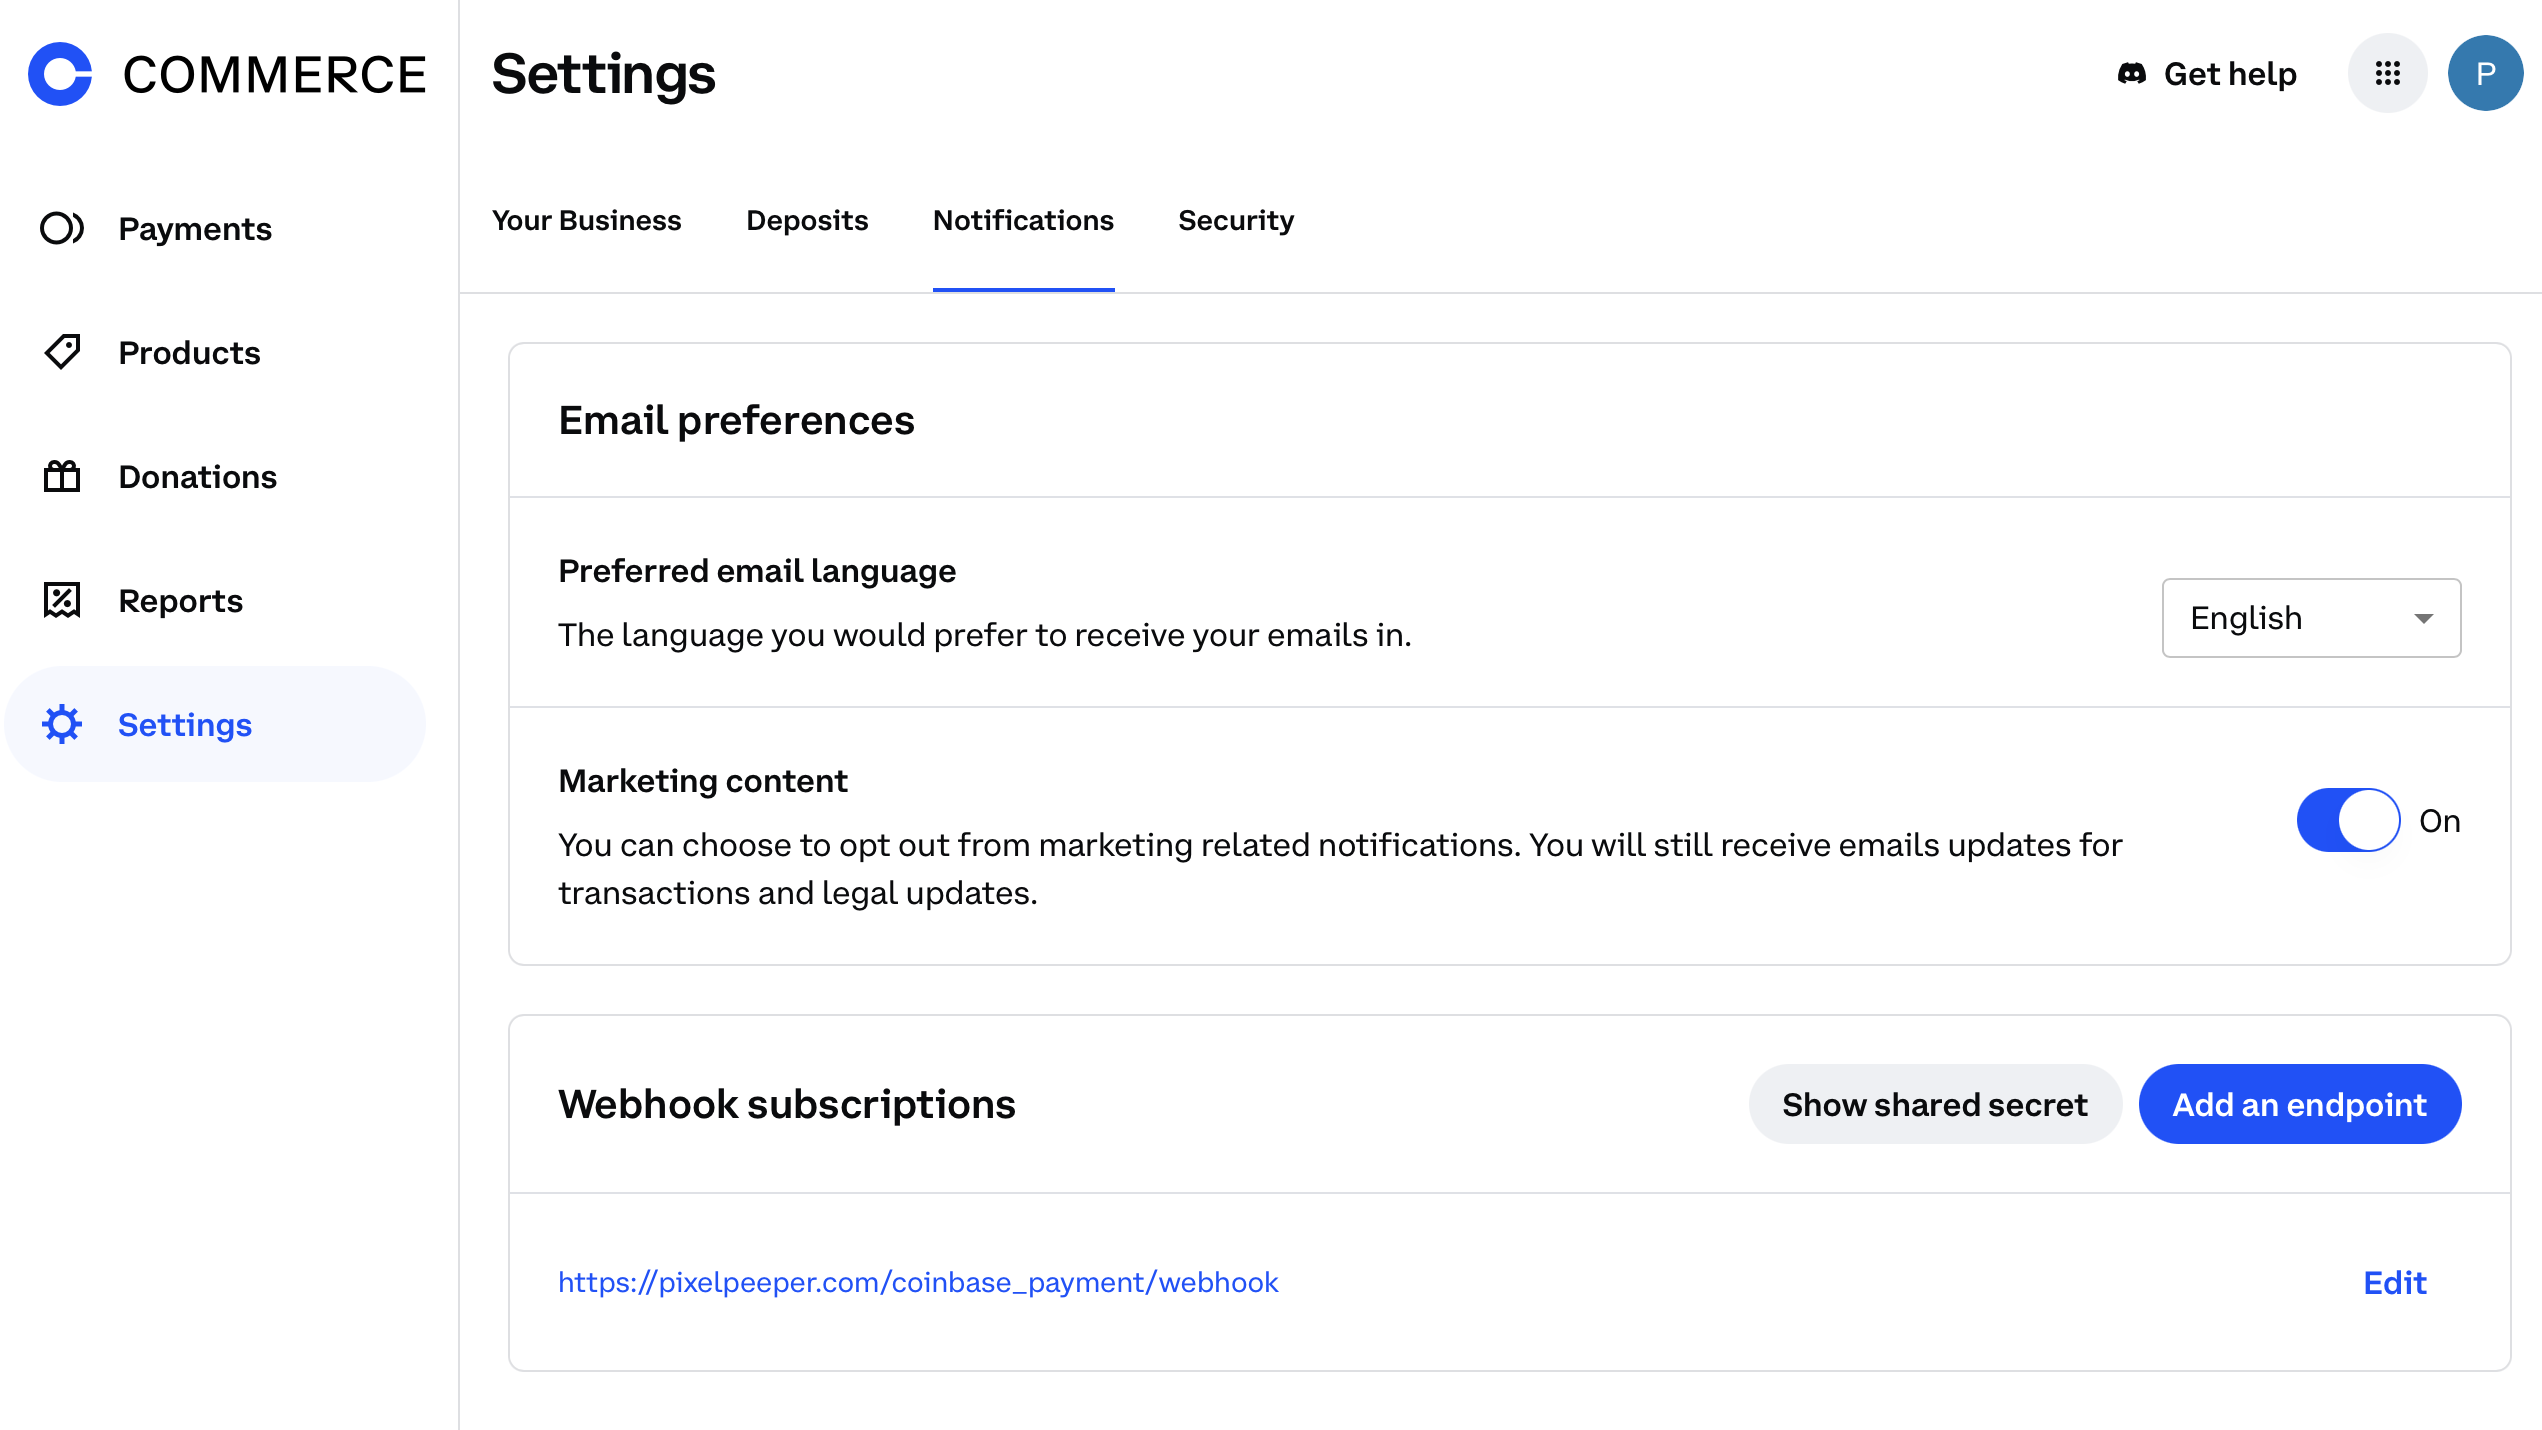
Set up your endpoint URL in the settings page.
Be sure to copy the Shared Secret key. It’s not the same as the API key.
Rails Integration
Here’s a (verbose and simplified) example of what the Rails integration might look like.
In your config/routes.rb, add the following:
resource :coinbase_payment, only: [:new, :create] do
  post :webhook
end
Then create a new controller in app/controllers/coinbase_payments_controller.rb:
class CoinbasePaymentsController < ApplicationController
  skip_before_action :verify_authenticity_token, only: [:webhook]
  before_action :verify_webhook_signature, only: [:webhook]

  # Page where the "Pay with Crypto" button is displayed
  def new
  end

  # After the user clicks the "Pay with Crypto" button
  def create
    response = Excon.post(
      "https://api.commerce.coinbase.com/charges/",
      headers: {
        "Content-Type" => "application/json",
        "X-CC-Api-Key" => Rails.application.credentials.fetch(:coinbase_commerce_api_key)
      },
      body: {
        name: "PixelPeeper",
        description: "PixelPeeper Lifetime Access",
        pricing_type: "fixed_price",
        local_price: {
          amount: "39.00",
          currency: "USD"
        },
        metadata: {
          email: Current.user.email,
          id: Current.user.id
        },
        redirect_url: root_url,
        cancel_url: new_coinbase_payment_url
      }.to_json
    )

    if response.status < 200 || response.status >= 300
      raise response.body.to_s
    end

    data = JSON.parse(response.body)

    redirect_to data.fetch("data").fetch("hosted_url"), allow_other_host: true
  end

  def webhook
    params.permit!

    event_type = params[:event][:type]
    if event_type == "charge:confirmed"
      email = params[:event][:data][:metadata][:email]
      user = User.find_by_email(email)

      # HANDLE THE PAYMENT HERE
    end

    render plain: "OK"
  end

  private

  def verify_webhook_signature
    signature = request.headers["X-Cc-Webhook-Signature"]

    if signature.blank?
      render plain: "No signature", status: :unauthorized
      return
    end

    secret = Rails.application.credentials.fetch(:coinbase_commerce_webhook_secret)

    computed = OpenSSL::HMAC.hexdigest("SHA256", secret, request.raw_post)

    unless ActiveSupport::SecurityUtils.secure_compare(computed, signature)
      render plain: "Invalid signature", status: :unauthorized
    end
  end
end
And the last bit, the views/coinbase_payments/new.html.erb file:
<%= button_to coinbase_payment_path, method: :post, data: { turbo: false } do %>
  Pay with Crypto
<% end %>
And that’s it! You should be able to accept crypto payments in your Rails app.
The Woes of Crypto UX
Coinbase hides a lot of the complexity involved in handling crypto, but there are still some confusing bits to be aware of.
First, the deposit address. Coinbase provides a Base.org address by default, which itself is already confusing (base? coinbase?). I decided to use my own ETH address, but that doesn’t necessarily mean the funds will be sent to it…
That’s right. If you get paid, the funds will not be sent to your address. At least not directly. Once you check the transaction on Etherscan, you might see something like this:
Transaction hash not found on Ethereum but found on Polygon POS
Depending on the currency the user chose, a different network will be used, so the transaction will be recorded on a different chain. That means, if you want to get the funds to the ETH Mainnet, you’ll need to use a bridge (no idea yet how that works, tbh).
Other than that, keep in mind that the confirmation time varies, so be sure to notify the user that it might take 5-15 minutes before their payment is confirmed.
That’s all. I hope it saves you some time if you ever decide to implement this in your Rails app. If it does, consider buying me a coffee 😉.